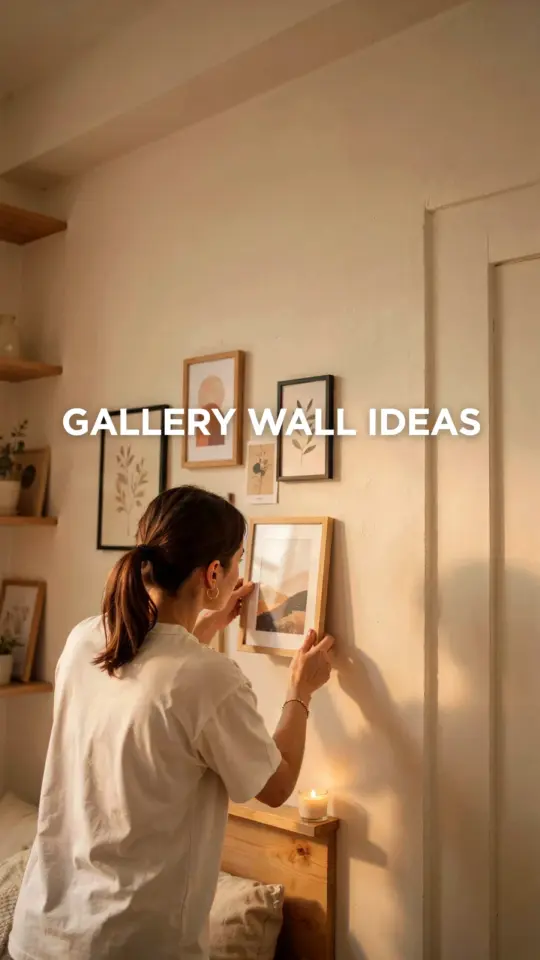
I have a confession: I used to dread gallery walls. The measuring, the leveling, the frantic erasing of pencil marks that refused to come off. Then I stumbled onto a trick that changed everything. These gallery wall ideas aren’t about perfect symmetry or expensive laser levels. They are about hanging your frames first, then adding wallpaper behind them. No leveling required. You shift layouts freely, test colors, and walk away without a single bubble of frustration. I tried it on my own dining room wall last fall and saved at least two hours of fussing. Let me show you exactly how this works and why it makes sense for your next project.
Why hanging frames first saves you from leveling headaches
Most tutorials tell you to measure, mark, drill, and hope. But paper and wallpaper are forgiving. Frames are not. If you put up wallpaper first, every nail hole you miss becomes a permanent mistake. If you decide to move a frame by two inches, you have to patch the paper and start over. That is not a home hack. That is a punishment.
By hanging your frames first, you treat the wall like a canvas. Use Command strips or simple nails to hold the frames exactly where you want them. Step back, live with the layout for a day, adjust as needed. Then, once the arrangement feels right, you cut the wallpaper to fit around those frames. You never level because the frames themselves become your grid. The wallpaper just follows their lead.
How to choose the right wallpaper for your DIY gallery wall
Not every wallpaper works behind frames. You want patterns that have a little breathing room so the art stays the hero. Large botanical prints, subtle geometric repeats, or textured grasscloth all work beautifully. Avoid tiny busy patterns that compete with small frames. I recommend peel-and-stick wallpaper for this method because you can trim it easily with a utility knife right against the frame edges. No glue, no mess, no waiting for paste to dry.
Another tip: pick a wallpaper with a distinct repeat pattern. That way, when you cut around frames, the mismatches are less noticeable. I used a marble design from a local hardware store, and the veining hid my imperfect cuts perfectly. If you want a bold look, go for a solid dark color. It makes your frames pop like museum pieces.
The step-by-step process for a no-level gallery wall
Here is my exact routine after testing this on three different walls. You can adapt it to your own space.
- Step 1: Lay your frames on the floor. Arrange them in a pattern you like. Take a photo with your phone as a reference.
- Step 2: Transfer that layout to the wall using lightweight temporary hangers. Command Picture Hanging Strips are ideal because they let you reposition without damage.
- Step 3: Live with the empty frames for 24 hours. Walk past them at different times of day. Adjust spacing or swap frames if something feels off.
- Step 4: Once the layout is final, remove the frames but leave the hangers. Measure the area behind each hanger location. Cut your wallpaper panels slightly larger than needed.
- Step 5: Apply the wallpaper panel by panel, smoothing from the center. When you reach a hanger, make a small slit and pull the paper around it. Trim excess with a sharp blade.
- Step 6: Rehang your frames. The wallpaper edges tuck behind the frame backs. You see only clean lines, no seams.
That is it. No spirit levels, no bubbles, no erasers. The hardest part is deciding which frames to use.
Best frame styles and materials to pair with wallpaper
Thin metal frames work well because they cast minimal shadows. They sit flush against the wallpaper and let the pattern show through around the edges. I personally prefer matte black or brass for contrast with light wallpapers. If your wallpaper is dark, white or natural wood frames create a crisp boundary.
Oversized frames are also a smart choice because they cover more of the wallpaper seams. You only need to cut wallpaper accurately near the edges of each frame, not in the center. That means more room for error. I always use mats inside the frames too. The extra white space prevents the wallpaper pattern from competing with the art inside the frame. A double mat with a dark inner line adds a professional touch.
Seasonal wallpaper swaps: a trend that works with this hack
This method is especially trendy right now because people are rotating wallpaper seasonally. In fall, you hang a warm terra cotta pattern. Winter, a soft blue or flannel-like texture. Spring, fresh leafy green. Since you are not applying wallpaper to the entire wall, you can swap it out every few months without much effort. Peel-and-stick panels are designed for removal.
I changed my dining room wallpaper from a dark navy to a pale sage green last April. Because the frames were already hung with level-free brackets, I just peeled off the old paper and stuck the new panels directly over the same area. The frames never moved. It took 45 minutes total. That is the power of hanging the hardware first.
Common mistakes to avoid when skipping leveling
Even with this forgiving method, a few pitfalls can trip you up. First, do not use heavy frames with adhesive strips on wallpaper. The paper might peel under the weight. Instead, use small nails or screws through the paper after trimming. Second, do not cut wallpaper too close to the hanger. Leave a quarter inch of overlap that gets hidden behind the frame. That tiny extra prevents gaps.
Another mistake: picking a wallpaper with a strong vertical stripe pattern that clashes with your frame arrangement. Stripes demand precise alignment, which defeats the purpose of skipping leveling. Stick with organic, flowing patterns. Finally, do not skip the test day. I once rearranged my layout five times in 24 hours. If I had committed to nails immediately, I would have had fifteen holes and a shredded wall. Patience saves you from patching.
Timely tips for spring or fall gallery wall projects
Right now, the trend is leaning toward matte textures and natural fibers. Linen-look wallpapers or cork panels work wonderfully behind frames. They add warmth without screaming for attention. For a fall project, try a wallpaper with subtle gold foil flecks. When your gallery lighting hits those flecks at dusk, the whole wall glows.
If you are working on a small hallway or a nook, consider a single large wallpaper panel behind one oversized frame. That creates a focal point without covering your entire wall. It also means you only have to cut around one frame. The time savings are real, especially if you are tackling multiple rooms before the holidays.
I have used this trick three times now and each time I feel a little smug about how easy it was. No leveling, no cursing, no tears. You just hang, adjust, paper, and done. Next time you plan a gallery wall, try this reverse order. Your frames will look intentional, your wallpaper will frame them perfectly, and your sanity will thank you.
Save this tip for your next project. Pin it or bookmark it. Then go grab a few frames and a roll of wallpaper. You will be surprised how fast your wall comes together.
#gallerywall #wallpaperideas #diygallerywall #homehack #wallart
Leave a Comment